This is part three of our three-part “Do-it-Yourself” (“D-I-Y”) series on breakfast:
- Part 1 is how to make your own yogurt
- Part 2 is how to make your own granola.
- This post is on how to make your own “cold brew” coffee
Why bother?
When you scroll down and see the steps below, you will probably wonder whether it’s worth it the effort to cold brew your coffee. Keep in mind that we go through this process only once per week, usually on Saturday night / Sunday morning. We drink a good amount of coffee, so if you are one person or drink less coffee, this could last you up to two weeks. If you currently make a pot of coffee every morning, this once-weekly effort is definitely less than the total amount of time you currently dedicate now to making coffee. Finally, the end result is less acidic, less bitter, and especially as iced coffee, is far superior.
——————————————————————————–
Cold brew coffee (also known as “cold press” or “cold-brewed” coffee) is a method of making coffee that does not use heat of any kind and instead allows the grinds to steep at room temperature for an extended period. If given enough time, water alone (without heat) will extract almost all of the desired flavors from coffee beans, as well as the “normal” amount of caffeine. Heat speeds up this reaction, but it also extracts undesirable elements, such as acidic compounds and oils that can give coffee a bitter taste.
Some sources say that cold brew coffee has just 1/3 the level of acidity of coffee brewed using heat (regardless of whether you use a standard drip machine, French press, espresso maker, etc.). I can’t confirm that exact statistic, but I can say that Lindsay used to have acid-related problems from drinking coffee, such as reflux, and those have disappeared since we switched to primarily drinking cold brew.
I can definitely taste a difference in flavor. The “interesting” flavors (hints of chocolate, cherry, all that nonsense) come through without any bitterness. I normally hate black coffee and need a lot of milk, but I can drink this coffee black. We find it best with just a dash of milk.
In any case, none of the reasons above are why we initially made the switch to cold brew. It was summer. It was hot. We were spending too much on iced coffee. (Why do so many coffee places charge a premium for iced coffee? After it’s diluted with ice, you get less coffee!) We read an article on cold brew and decided to give it a shot.
A year and a half has passed and we couldn’t be happier with this method. We’ve tweaked the recipe and upgraded our equipment to make things a bit more efficient, but it’s all still very similar to that first batch that we made. We generally have to make coffee only once per week and then we get to have coffee “on tap” at any time. During the winter we heat it up and it is still delicious. It beats having to run our or having to make (and wait for) a whole pot. Finally, I estimate that we save at least $35 per week vs. getting our coffee “on the outside“.
Essential Hardware
These are pieces of equipment that you will need no matter how you tweak our specific method. We have linked to the equipment that we use or to the most comparable equipment that I could find.
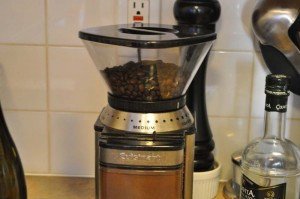
- A coffee grinder (preferably a burr grinder)
- A large capacity glass jar for brewing and storage
- A large capacity fine mesh sieve
- A large mixing bowl with spout
- A large wooden spoon
Additional Hardware
These are pieces of equipment that we use in our exact method. They help us get through the process faster and let it run without being watched as much, but are not exactly “necessary”. Read the steps and try things out for yourself.
- A 64 oz. pitcher
- A large capacity measuring cup (at least 4 cups)
- A large Chemex coffee carafe
- Coffee filters (any kind; these fit the Chemex)
- A high-capacity Brita or other water filter
Ingredients
- Whole coffee beans – 1 lb bag (that is, 16 oz. Beware the 12 oz bags!)
- Fitlered Water – 10 cups
Directions
- Grind 1 pound of coffee beans to a coarse grind. If you are just experimenting with this you can use any coffee grinder, but we find that results are vastly improved by using a burr grinder
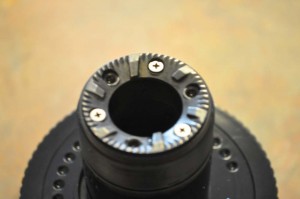
. Blade grinders use a blade to “chop” the coffee beans, which means that you can’t control the coarseness of the grind and the grinds will be inconsistent in size. A burr grinder crushes the beans between two burrs (hence the name), and provides perfect consistency and control. We set ours to about 3/4 of the maximum coarseness.
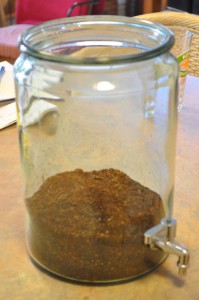
- Put the grounds into a large bowl or jar. We prefer to use glass to make sure that nothing leaches.
- Pour 2 cups of the filtered water into the grounds and mix it thoroughly with a wooden spoon. The goal is to get the grounds consistently moist. At this ratio they should end up being very damp but not quite muddy. Flatten out the top of the grounds so that the surface is even.
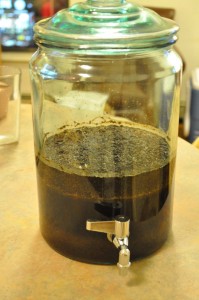
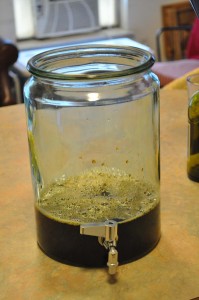
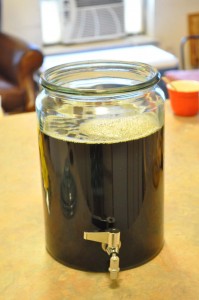
- Pour the remaining 8 cups of filtered water over the dampened grounds. Do this gently so that this new water “sits” on top of the damp grounds. Do not mix. The goal is a “two-tier” arrangement which you can somewhat see in the picture below.
- Cover the container and let it sit at room temperature for 10 – 12 hours. After 12 hours, more of the bitterness will be extracted. If left for fewer than 10 hours the coffee will be somewhat weak.
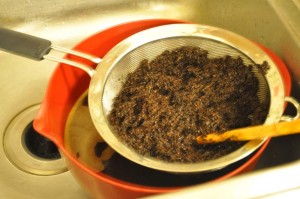
- After the brewing period, pour the contents through a fine mesh sieve into another container. Even when using a sieve as large as 8″, we have to do this in two stages because the sieve is not large enough to hold all of the grounds at once. Pour as much of the liquid through the sieve as you can and scoop grounds into the sieve until the sieve is 3/4 full. Then use the wooden spoon to move the grounds around the sieve to extract additional liquid. Once the grounds in the sieve are mostly dry, throw them away and repeat until the brewing vessel is empty.
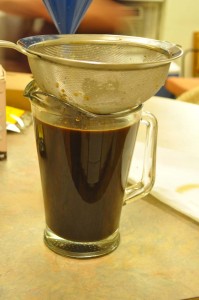
- At this point the grounds should all be in the garbage (or compost), and you should have a container full of liquid. However, I guarantee there is still “sludge” the bottom of the liquid. This is where a second fine-mesh strain is important. I pour the liquid through a second, smaller sieve into a large (64oz) pitcher. You can choose to clean and re-use the original brewing vessel and sieve, but once we started doing this routinely, we decided to invest in the additional equipment. The pitcher also comes in handy later on.
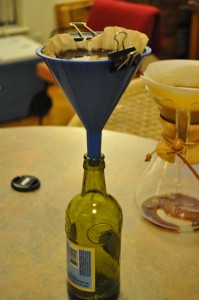
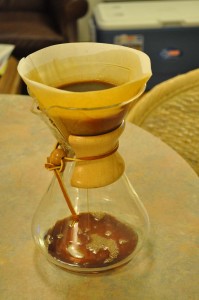
- Once the coffee has been strained twice and the grounds and sludge are removed, the final step is to filter the liquid through a paper filter. When we first started doing this, I used a few over-sized beer bottles, some plastic funnels, binder clips, and standard paper basket coffee filters (left pic). The problem with this setup is that these can easily be knocked over, and the bottles don’t have very much capacity. I overfilled them more than once. I eventually bought a large Chemex carafe to do the job (right pic). It also occasionally comes in handy to make coffee the “normal” way, since we don’t have a coffee machine.
- Regardless of the setup you use for your final filtration, chances are a single coffee filter will hold a maximum of 1/4 of the total liquid. You will need to watch the rig and refill the filters as they drain. This is where it is handy to be using a pitcher, since it makes for an easy pour. I often change the filter each time it drains through, since coffee “sediment” will build up and a second pass through a “used” filter can take forever. When I am in a rush I will get out the Chemex and the old beer bottles and have multiple filters working in parallel.
- Total filtration time is usually between 1 and 2 hours, depending on how many you have going at the same time and how frequently you replace the paper filters. Congratulations! You now have cold brew coffee concentrate. You can store your coffee concentrate as-is and add water each time you want a cup of coffee. The proper ratio depends on personal preference, but 2 or 3 ounces of water for each ounce of concentrate usually works (that is, between 2:1 and 3:1). The concentrate will store just fine in the fridge for up to two weeks, but be sure to store it in a glass container. The acid may leach chemicals from a plastic container.
- However, we prefer to pre-dilute our coffee so that we can enjoy it “on-tap”. You may have noticed that our “brewing vessel” has a spigot. We came to that over time for a reason. While the final filtration occurs, I wash out the original brewing vessel. As the filtration completes, I empty the concentrate back into the original jar.
- I then fill the jar the rest of the way up with water. I used to carefully measure out a 3:1 ratio of water to concentrate, but now I just know where to stop. It helps that we have a mega-capacity Brita filter
. I make sure to fill the Brita when I start the filtration process and when everything is done I just prop the whole Brita up on top of the jar and drain it.
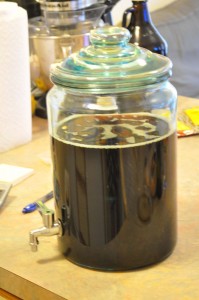
- When it’s all done, there is just enough room for the entire jar to fit on the middle shelf in our fridge. Yes, it takes up a lot of room in there, but we drink a lot of coffee, and it serves 15 – 20 cups. In the summer we drink it on tap with a dash of milk. When it’s cooler we pop it in the microwave for 1 minute. Presto!

