Canning is preserving food in jars using scientifically and time-tested techniques. Water-bath canning (as opposed to pressure canning, which isn’t discussed here) isn’t scary or difficult and doesn’t require a huge up-front investment. It does, however, require a little time and planning, but you can make up for lack of time with planning and lack of planning with time.
If you have questions or live in the NYC area and want hands-on help, send me an email at lindsay@eatlocal365.com.
You might want to read these posts before you dive into the process:
The Science
Our Unbreakable Rules
Information on where to get supplies and references for books/websites are at the end of the post.
The Procedure
Okay, here we go. It looks like there are a lot of steps and there are, but once you’ve done this a few times, it’ll be like tying your shoes.
- Read the recipe and check your supplies!
I can’t tell you how many times I think I’ve got everything planned out only to realize that the strawberries have to macerate in the refrigerator overnight or that I don’t have enough sugar. I have also made many many last minute trips to the hardware store for more jars, enlisting Erik to watch the boiling pot. My new rule is to have 2-4 more jars on hand than the recipe calls for, because yields vary even if you follow the recipe exactly.
- Buy your food.
I usually try to do my shopping a few days before I plan to can. This accomplishes two things. First, it takes one thing off of my list on canning day. Second, it allows the food (especially fruit) to ripen a little before it goes into the jars. Fruit isn’t usually sold at perfect ripeness, so allowing it to sit for a couple of days will usually result in tastier canned goods. This isn’t as important for vegetables.
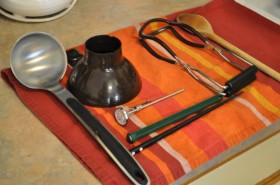
- Wash and lay out all your tools.
It’s annoying to have to get out another spoon or prep another jar when you’re in the middle of everything, so take time at the beginning to get yourself set up. For me, this includes:
- Canning pot, lid, and rack
- Pot for cooking the food
- Wooden spoons
- Ladle
- Jar lifter
- Funnel
- Clean towel
- Chopstick
- Magnetic lid-lifter or tongs
- Slightly damp paper towel
- Small pot for heating lids
- Jars, lids, and screwbands
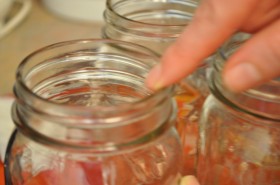
Check each jar rim for cracks and chips by running your finger around the inside. Don’t use a chipped jar. Even new jars sometimes have flaws.
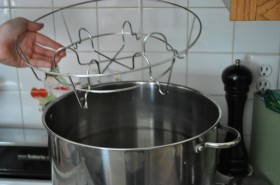
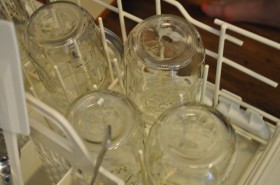
- Set the rack in the bottom of the canning pot and fill it with water. Add the jars and screwbands. Heat on high.
You’ll need a lot of water and this takes a long time to get to a rolling boil, about 45 minutes on my stove. If the recipe looks like it will take a while, I might wait to turn on the stove, but I always fill the pot and set it on the burner first, because my pot will only fit in an empty sink.If your recipe calls for a processing time of less than 10 minutes, you will need to sterilize the jars and screwbands by boiling them for 10 minutes before filling them. Make sure it’s a crazy, active boil, not just a few little bubbles. If you will be processing the jars for at least 10 minutes, you don’t need to sterilize them, but you should heat them up before filling. A swift change in temperature could cause the jar to shatter.
- Make your recipe.
Depending on how long the recipe takes, you might want to adjust the order of the next few steps.
- Fill a small pot with water and add as many flat lids as the recipe calls for. Bring this almost to a boil, turn off the heat, and cover until needed. Keep a few clean lids nearby, but don’t heat them until you need them.
- Fill the jars.
Put a tea towel on the counter to insulate the jars from a temperature change (see #4). Make sure it’s a towel that you don’t mind staining (I use an old, red one that doesn’t really show stains). Use a jar lifter to remove the jars and screwbands from the canning pot, pouring the water back into the pot. Set the jars and screwbands on the towel.
Some recipes will call for you to pack food into the jars and then pour hot liquid over them. If so, make sure you pack tightly to prevent “floaters” (food that floats above the liquid), which will discolor, but will still be safe.
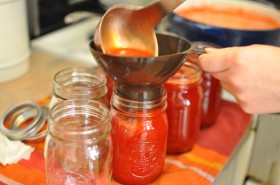
Using a canning funnel to fill the jars with liquid will make the process faster and less messy.
- “Bubble” the jars.
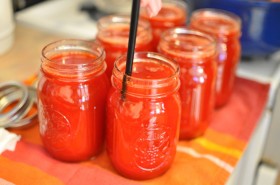
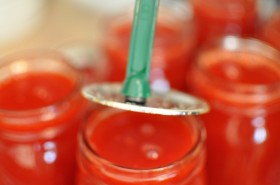
Run a chopstick (or thin spatula) around the inside of the jar to remove air bubbles. This will help prevent discoloration and spoiling. It will also help you pack more into the jar, so that your yield matches the recipe’s.
- Check the “headspace”.
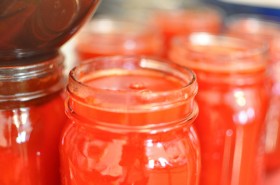
Every recipe should specify the headspace, the amount of empty space between the contents and the lip of the jar. This is to avoid leakage, because the food and air will expand as the jars are boiled. It also allows for the formation of a vacuum as the jars cool. Check each jar individually and add or remove as needed.
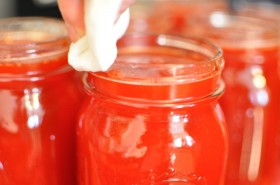
- Wipe the rim of each jar with a slightly damp paper towel to remove any residue.
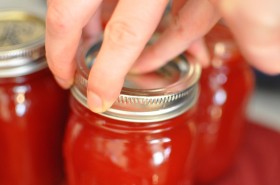
This will help create a good seal. - Set the flat lid on the jar using a magnetic lifter or tongs. Add the screwband and screw on gently.
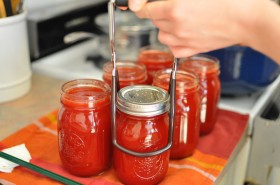
Don’t crank on it. Just get the band on finger-tip tight. The jar has to be able to vent air bubbles. - Use the jar lifter to put the jars in the canning pot. Try to keep them upright. The jars should not touch each other or the sides of the pot. The water needs to flow freely to properly heat the contents.
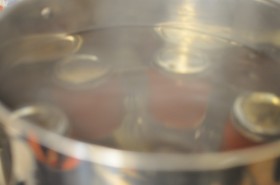
- Put the lid on the canning pot and process (boil) the jars for the stated amount of time.
No more, no less! Set a timer, so you don’t forget. Don’t start timing until the water is really boiling hard. It would be a shame to waste all that work by rushing this step. I usually clean up while the jars are processing. - Once the processing time is up, turn off the stove, take off the lid, and let the jars sit for five minutes.
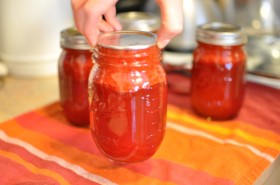
This will help a good seal form. - Take the jars out of the canning pot and set them on the towel. If the room is cool, cover them with another towel, so that they don’t cool down too rapidly.
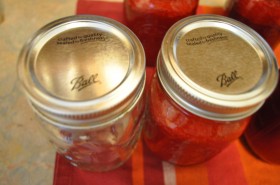
- After about an hour, check for a seal by confirming that the lid is now concave. An unsealed lid has a visible “button” on the top. A sealed lid is concave and doesn’t flex if you push down on it. Refrigerate any jars that didn’t seal and eat within a week.
- After about 8 hours, remove the screwbands and test for a seal by lifting the jar up by the lid only. Just pick it up an inch or so off the counter. If the lid comes off or feels wobbly, refrigerate and eat within a week. If it stays firmly on, you have succeeded!
- Wipe the jar rims to remove any residue that might cause the lid to rust. Sometimes some of the liquid inside will leak out a little.
- Label the jars!
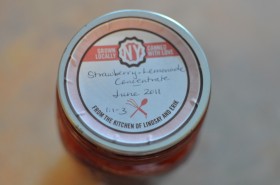
This is critical. You might think you’ll remember the day you made strawberry jam, but you probably won’t and you might not be able to tell the strawberry from the raspberry. On each jar, note the contents and the month/year they were canned. You can use a permanent marker to write directly on the lid or make cute labels, like my brother did for me.
- If you want, keep an inventory of what you make, when, and how much.
This really helps me plan for what to make in subsequent years, because I learn, for example, that I made way too many jars of pickles in 2010.
- Store the filled jars for up to a year in a relatively cool, dark place.
Ideally, they should be kept between 50° to 70° F. Leave the screwbands off while storing. This will help you quickly notice any jars with domed or easily-removed lids, an indication that they have gone bad and should be thrown out.
- Remember to use what you preserve!
The whole reason for canning is so that you can enjoy local peaches in December. Make what you’ll eat and use it up or give it away.
Supplies
Canning requires a series of one-time investments over the course of your first season, and then you can re-use everything for years. The jars and screwbands are reusable (until they chip or rust), so remember to ask for them back if you give stuff away. Most people are happy to comply. The exception is that you must use a new flat lid every time because the adhesive won’t hold a second time around.
Make sure that you buy jars specifically made for canning, which are often called mason jars. Do not reuse a commercial glass jar, like one from spaghetti sauce.
I get most of my supplies from my local hardware store, where it’s MUCH cheaper than at a specialty store. They’ll even order different sizes and styles of jars for me, if I want. Check your local hardware store first and ask someone if you don’t see the canning section right away.
Other than a hardware store, there are lots of other places to get this stuff. I’ve listed a few below, but they’re pretty NYC-centric. If you have a favorite place in your area, let me know and I’ll add it.
- The Brooklyn Kitchen
- Broadway Panhandler
- Fishs Eddy
- Amazon
- Lehmans
- Also, talk to your friends and relatives, especially the older ones. Many people have a stash of jars somewhere from the good ol’ days and would be happy for you to take them off their hands. You’ll likely have to replace the screwband, but that’s pretty cheap.
Resources
These are my favorite books and websites, but there are tons and tons of places to go for recipes and help. Just remember to follow the Unbreakable Rules!!
Books
- Ball Complete Book of Home Preserving
- Homemade Living: Canning & Preserving with Ashley English: All You Need to Know to Make Jams, Jellies, Pickles, Chutneys & More
- I got these three books for Christmas and they look great because they include ideas for using the preserves, but I haven’t used them yet – The Art of Preserving
, Canning for a New Generation
, Well-Preserved
Websites/Blogs
This not an exhaustive list at all…just the ones that I regularly visit.
- National Center for Home Food Preservation
- Food in Jars
- Small Measure (this is the Ashley English of the book recommendation above)
- Tigress in a Jam/Pickle (check out her Can Jam from 2010 for lots of great ideas)
- Well Preserved
- Local Kitchen
- Doris and Jilly Cook
- Putting Up with the Turnbulls

I was thinking if after work we could grab a cup of coffee
I see your site needs some fresh articles.
Writing manually is time consuming, but there is solution for this hard task.
Just search for – Miftolo’s tools rewriter
[...] Preserving Local Foods in Jars (a.k.a. Canning) [...]
[...] Preserving Local Foods in Jars (a.k.a. Canning) [...]
[...] Preserving Local Foods in Jars (a.k.a. Canning) [...]
[...] Preserving Local Foods in Jars (a.k.a. Canning) [...]
[...] Preserving Local Foods in Jars (a.k.a. Canning) [...]
[...] Preserving Local Foods in Jars (a.k.a. Canning) [...]
[...] Preserving Local Foods in Jars (a.k.a. Canning) [...]
[...] Preserving Local Foods in Jars (a.k.a. Canning) [...]
[...] Preserving Local Foods in Jars (a.k.a. Canning) [...]
[...] Preserving Local Foods in Jars (a.k.a. Canning) [...]