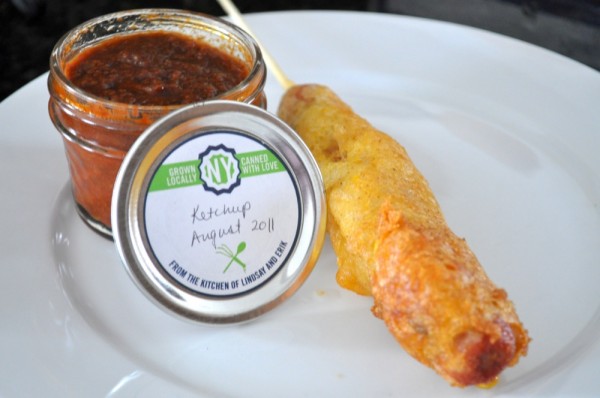
Fried foods on a stick are popular summer treats, especially in Minnesota, where I will be attending my second state fair this August (and Lindsay her… well it’s been many). We tried tackling one standby at home, as natural and from-scratch as we could get it (we skipped making our own hot dogs). The results were great! And it wasn’t even very hard. Make these on July 4th and be confident in what you’re feeding your family (foods on a stick from carnie vendors… generally a total crapshoot!).
Homemade Corn Dogs
Serves 8+
| Amount | Ingredient | Preparation | Where we bought it (SWM = Somerville Winter Market) |
|---|---|---|---|
| 3 – 4 quarts | Safflower oil | See note below | We got the Whole Foods organic brand due to the volume, but one option we often use is Stolor Organics |
| 1 cup | Yellow cornmeal | ||
| 1 cup | All-purpose flour | ||
| 2 tsp | Kosher salt | ||
| 1 tsp | Baking powder | ||
| 1/2 tsp | Cayenne pepper | ||
| 2 TBsp | Fresh jalapeño (about 1 large) | Remove the seed and mince it; for less spice scrape down the insides to remove additional oil; we used about 5 dried jalapeños that we had on hand instead | |
| 1 can / 8.5 oz | Creamed corn | If it’s in season, use fresh corn off the cob | |
| 1/3 cup | White or yellow onion (about one small or half a large onion) | Finely grated | |
| 1.5 cups | Buttermilk | ||
| 4 TBsp | Corn starch | ||
| 8 | Hot dogs | ||
| 8 | Bamboo skewers |
Directions
- First, a few pieces of equipment that you will need:
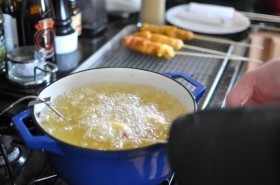
- A heavy pot for boiling the oil, preferably one that is deep for its width. We need a deep pot for sticking in the hot dogs, but the narrower it is the less volume there is for a given depth and the less oil will be need and the faster it will come to temperature. All we had was our Dutch oven
. It worked just fine.
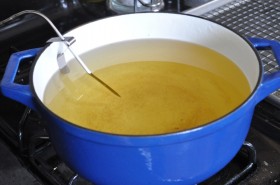
- A thermometer and a way to clip it to the side of you pot. Our digital thermometer
came with a clip (see the pictures), but other methods include using binder clips
.
- Disposable bamboo skewers
to star as “the stick.” An alternative is to use chop sticks.
- Gloves
. Holding the end of the sticks with exposed hands when frying these is a risky proposition. We tried. There was very little oil splash back, but enough to hit our hand and make us drop one of the dogs to the bottom of the fryer. Fishing it out was not fun (and far more dangerous). We then started using our glove-shaped oven mitts.
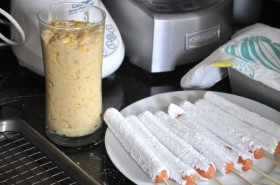
- A tall, narrow glass or container for the batter dipping step.
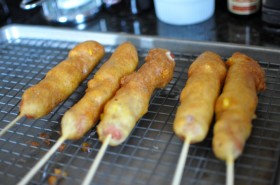
- A cooling rack and sheet pan
. We used a rack that we have for cookies placed inside of a sheet pan, to catch any oil that drips.
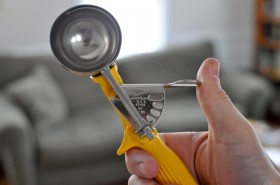
- An ice cream scoop
and a slotted metal spoon or spider
, if you want to take advantage of the leftover batter to make hush puppies. A large spoon or ladle will also do in a pinch, but an ice cream scoop is perfect for the job.
- A heavy pot for boiling the oil, preferably one that is deep for its width. We need a deep pot for sticking in the hot dogs, but the narrower it is the less volume there is for a given depth and the less oil will be need and the faster it will come to temperature. All we had was our Dutch oven
- Pour the oil into the pot, attach your thermometer setup, and heat the oil until it’s at 375 degrees.
The amount of oil that you need will depend on the size of your pot. With our Dutch oven we only needed to use 3 quarts, as opposed to 4. If you happen to have an actual fryer you should be able to use less oil, but we do not. For normal cooking and baking we use local, organic sunflower oil, but given the volume and the cost we opted for the Whole Foods label organic. On the plus side, we will reuse all of it.
- In a mixing bowl, combine the dry ingredients (cornmeal, flour, salt, baking powder, baking soda, and cayenne pepper). In separate, larger bowl, combine the solid and liquid ingredients (minced jalapeño, corn, grated onion, and buttermilk). Add the dry ingredients to the wet ingredients all at once, and fold the ingredients together only enough times to incorporate the dry into the wet and bring the batter together. Don’t worry about the lumps; once you’ve eliminated any dry patches in the batter, just stop. Set batter aside and allow to rest for 10 minutes.
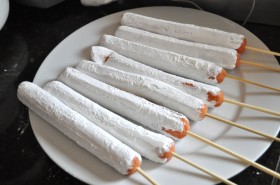
- Cover a sheet pan or Pyrex dish (something flat and shallow with a larger surface area) with a layer of corn starch. Skewer each hot dog onto one of the bamboo skewers, and then roll each to coat.
We didn’t make our own hot dogs (although we did once make our own sausage from scratch for an Oktoberfest party… but that’s WAY more involved). We do try to buy the best 100% all-natural, all-beef dogs from our local beef vendor (or butcher). The point is, if you’re going to go through the effort to make these (amazing) corn dogs, don’t skimp on the meat and get a bunch of nitrate-filled Oscar Meyer Weiners.
- Once it has rested, pour some of the better into the tall glass (refill as needed).
- Once the oil is at 375, have your assembly line ready. It helps of you have two people (especially since our “protective frying gloves” were actually clumsy rubber oven mitts; if you have better gloves it would make it easier for one person to do it all!). Here are the steps:
- Dip a hot dog into the glass of batter to coat.
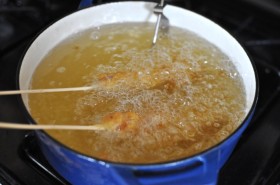
- Place the battered dog into the frying oil and hold it there so that it is below the surface and not touching the sides or bottom.
- Hold the dog there until the coating is golden brown, abou 4-5 minutes (in our pot we were able to do two dogs at a time).
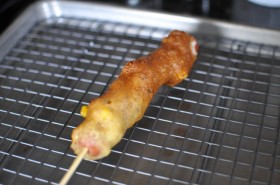
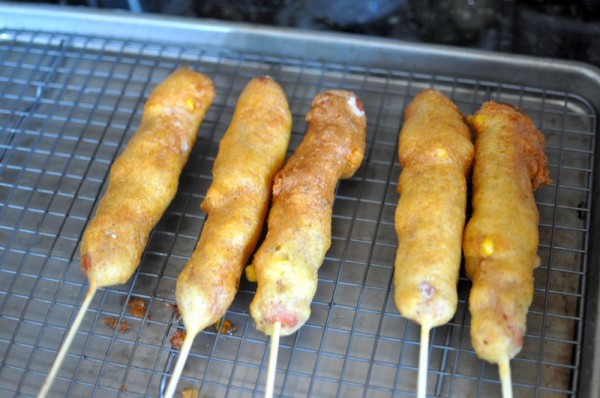
- Carefully remove and set aside on your cooling rack setup and let it cool for at least 5 minutes.
Make sure to keep monitoring the oil temperature. You want to maintain 375 degrees. When you place food in, the temperature will drop, so between hot dogs (or pairs), be sure to give the oil time to come back to temperature. Alternately, if you have the heat on too high, make sure that you don’t exceed 375 and adjust your flame accordingly. Hitting the right oil temperature is one of the keys to good frying.
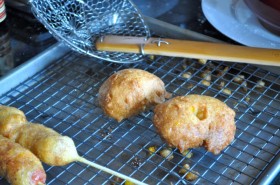
- We wound up with a good amount of extra batter from this recipe. With this advanced knowledge you could choose to buy a few more hot dogs, or do like we did and just go nuts making hush puppies. We poured the remaining batter into a shallow bowl and used and ice cream scoop to measure out the batter and place it in the oil. The process is the same as for the corn dogs, except that you need a slotted metal spoon or spider to retrieve them from the molten oil.
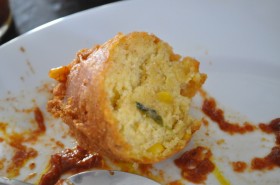
- Enjoy the fruits of your labor!
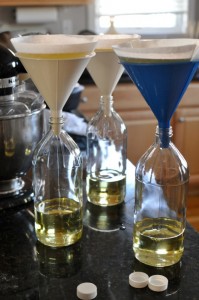
- When you’re done frying, leave the oil off the heat for a few hours to cool. Cover the pot if you like; it will take longer to cool but definitely be safer! A few hours later / the next morning, filter the oil back into its original bottles. This oil can be reused for frying 2-3 more times (many people would say many more times as well).
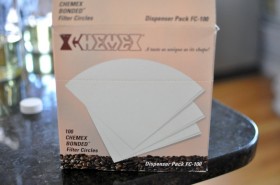
We used three bottles, so we had three funnels and three filters ready to go. We use Chemex cone coffee filters to do the job, because their shape makes them really easy to use with a conical funnel and they can hold more than a regular coffee filter, meaning fewer times having to “top up” the filter as it drains.
Yum!

