In case we have a repeat of the great canned pumpkin shortage of 2009, it’s good to know how to make pumpkin puree from scratch. The canned version isn’t bad in terms of ingredients, since it only contains pumpkin, but this is a great opportunity to support local farmers.
You might be surprised to learn that there are LOTS of kinds of pumpkins. Our market is overflowing with them right now and it seems that every farmer has a unique type or two. Dickinson, sugar, and cheese are recommended for pie and are pretty easy to find at a farmers’ market. You should definitely ask your farmer, though, because he or she might have a special one that would be excellent.

We like cheese pumpkins for pie. The outside is much paler than other pumpkins, but the inside cooks up smooth and creamy.
My usual method is to roast the pumpkin until it’s very soft. I recently read a slow cooker method on The Nourshing Gourmet. I used both methods on Friday to puree two pumpkins. Pumpkin puree keeps very well in the freezer and is tasty in all sorts of things, so as long as you’re doing one pumpkin, you may as well do two. It works like a banana in baked goods and smoothies, adding moisture and a velvety texture. It’s also easy to add to soups and casseroles to give yourself an anti-oxidant boost.
Roasting Method:
- Preheat your oven to 375 degrees. Set out a baking dish or rimmed cookie sheet big enough to hold the two halves of your pumpkin. You won’t want to dig one out when your hands are pumpkin-y.
- Give your pumpkin a good bath. Even if you’re sure there aren’t any lurking chemicals, it still grew in the dirt.
- Cut the pumpkin in half from top to bottom (not around the equator).
- Work the tip of your knife in near the stem and push down slowly. Remember that the pumpkin is hollow, so don’t let your knife sink too far in – it’ll just get stuck.
- Once you’ve made it all the way down one side, flip the pumpkin around and cut through the other side, skipping the stem. You might be able to crack it open before cutting all the way through. If you can’t, cut around the stem to finish cutting the pumpkin in half. Don’t try to saw it off with your knife, though. You’ll end up with a really dull knife and the stem still attached.
- Note: if you don’t have a sharp knife or are a little apprehensive, just skip this step and toss it in the oven whole for the first 30 minutes. It’ll be a lot easier to cut once it’s had a chance to soften, but you’ll have to increase the baking time by 15 minutes or so.
- Brush or rub the outside and cut edge with a little olive oil.
- Place the pumpkin halves, cut side down, on the baking dish or cookie sheet and put in the oven.
- Let the pumpkin roast for 45 minutes to an hour. If you notice the edges burning, turn the heat down to 350 degrees. You might need more or less time, but you’ll know it’s done when you can easily pierce it with a sharp knife.
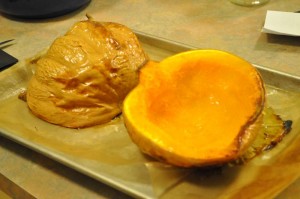
- Remove the pumpkin from the oven and let it cool down for an hour. Trust me. I’ve gotten burned for being overzealous.
- Proceed to “Final Steps”.
Slow Cooker Method:
- Give your pumpkin a good bath. Even if you’re sure there aren’t any lurking chemicals, it still grew in the dirt.
- Cut around the stem like you’re making a jack-o’-lantern. If you’re thrifty/obsessive like me, you’ll cut the extra pumpkin off of the piece you just removed and put it back in the pumpkin.
- If your pumpkin is small enough to fit into your slow cooker whole, prick it a few times with a fork and drop it right in. If it’s too big, cut it in half, following the steps under Roasting Method. If the halves don’t fit, cut it into wedges or chunks or cut a little bit off the top. You can stick the odds and ends into the middle. We had to use a lot of trial and error to get ours in. This was mostly because I was stubborn and insisted that my (horribly horrible) spatial skills trumped Erik’s (awesomely awesome) spatial skills. It’s much easier to eye-ball the width than it is the height.
- Cook on low for 6 to 8 hours. It’s done when you can easily pierce it with a sharp knife.
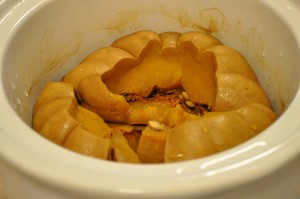
Our slow cooker switches to “warm” after the cook time is up. Since that was scheduled to happen around 5 am and I didn’t want the pumpkin to burn (or to get up and shut it off), we used a light timer to turn off the cooking. By the time we got up in the morning, it was totally smushy and cool enough to handle. - Remove lid and let the pumpkin cool down, so you don’t burn yourself.
- Proceed to “Final Steps”.
Final Steps:
- Once the pumpkin has cooled, pull out the seeds and stringy parts. (Save the seeds!)
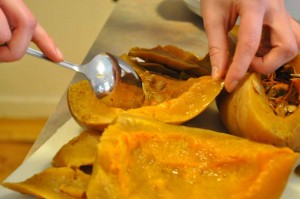
- Scoop the flesh into a food processor or blender. Process or blend it until you have a very smooth consistency. If you don’t have either, you could mash it well with a potato masher or a couple of forks, but it won’t be as silky.
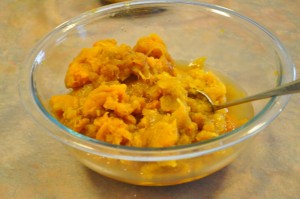
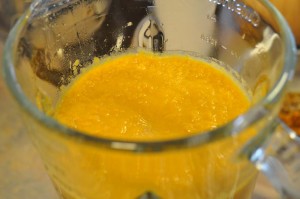
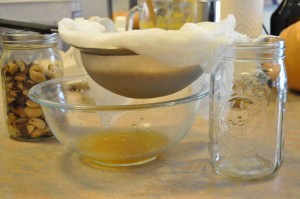
- The puree will probably be wetter than the canned version, particularly if you used the slow cooker method. This doesn’t matter for all recipes, but if you have time, you can strain it. Spoon the puree into a colander lined with a few layers of damp cheesecloth and let it drip for a couple of hours or until the drips are infrequent. You can save the juice for oatmeal or smoothies. Transfer the puree to fridge- or freezer-safe containers for storage. I like to freeze it in 1- or 2-cup portions in zip-top bags or glass canning jars.
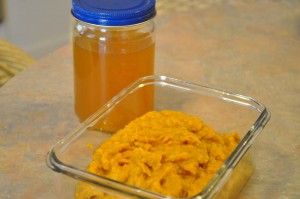
Verdict: I definitely like the slow cooker method better. There’s less to worry about and the flesh was much easier to scoop out and puree. The only downside was that it was much wetter than the roasted version. This is because slow cooking is like braising, which traps moisture. I might try putting a dishcloth under the lid next time to see if that helps.

[...] cup pumpkin puree (fresh, if possible, but canned is fine) 1 teaspoon cinnamon 3/4 teaspoons ground ginger 1/4 teaspoon [...]
[...] for this soup. I used it to make the vegetable stock a few weeks ago, which I froze, to cook the pumpkin overnight last night, and to make the soup this afternoon. If you don’t have a slow cooker, [...]