Part of eating locally is re-examining the processed products you usually buy at the grocery store. We started by reading labels and trying to pick the container with the fewest “scary” ingredients. From there, we realized that the stuff we were buying didn’t have that many ingredients anyway and could probably just be made at home. This led to making yogurt and granola, among other things. All this is to tell you that seemingly crazy habits, like eschewing boxed cereal, weren’t always habits. They happened gradually.
Last year at this time, I tried making my own pie crusts. This year, I’m ready to kick evaporated milk out of my shopping cart. That little can always appears at pumpkin pie time, but have you ever read the label? Milk, Dipotassium Phosphate, Carrageenan, Vitamin D3. I’m cool with milk and vitamin D3, but what the heck are those other two things??? Carrageenan is made from seaweed and is used in food as a thickener. Dipotassium phosphate is used in food to prevent coagulation and, according to the EPA, is also used as a fertilizer and can be made into a pesticide. Yum.
Evaporated milk is just that – milk that has had some of the water evaporated off to thicken it. How hard could that be? According to these directions, we want to reduce the initial milk volume by 60%. Thus, to replace a standard 12 ounce can, we need to start with 30 ounces or 3 and 3/4 cups of milk. Use these formulas to adjust the starting amount, if you need something other than 12 ounces in the end.
[Ending Amount] divided by 0.4 = [Starting Amount]
[Amount in Ounces] divided by 8 = [Amount in Cups]
I don’t think it matters if you use whole or skim milk, but skim milk will be thinner even when evaporated. At some point, I want to try using skim milk with a few tablespoons of non-fat milk powder to see if I can get the same consistency as low fat or whole milk.
Warning: This will take a couple of hours, so you might want to make it the day before you plan to use it.
- The first step is to choose your pot. Pick something with a thick, heavy bottom. This will help the milk cook without burning. If you have a choice of heavy-bottomed pots, pick the widest one. The wider the pot, the faster the milk will evaporate.
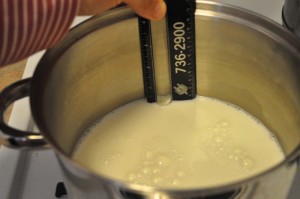
- Measure out the amount you want in the end (e.g. 12 ounces) and pour it into your pot. Use a clean ruler to measure the depth of the milk. This will let you figure out when you’re “done”. You might want to write it down, if you have a tendency to doubt your memory, like I do.

- Pour in the rest of the milk and bring it to a boil, stirring constantly. You don’t want the milk to burn.
- Once the milk comes to a boil, turn the heat down and try to maintain a very low simmer.
- Stir the milk occasionally to get rid or the skin, which will keep liquid from evaporating.
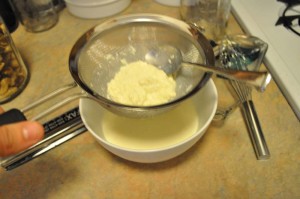
- It will take an hour or two, depending on how wide your pot is and how much milk you’re working with. You’ll know it’s done when the liquid is a little deeper than it was in Step 1. The extra depth will compensate for the chunky stuff that you’ll strain out in the next step. We didn’t allow for this when we made it, so we were a little short and added some water to make up for it.
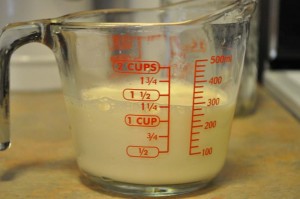
- Strain the the evaporated milk through cheesecloth or a fine sieve to filter out the coagulated solids. Pour it into a glass container, let it cool, and store it in refrigerator for up to a week.


Swietny blog, widze po postach, ĹĽe myslimy o zyciu podobnie:)
I am wanting to start my own business and need to know how to start a website for a cheap/free price.. I am looking to start my own photography business and want to get a website up. I am planning on using this for a way to let people know about me, give them different albams of an axample of my work and then a way to contact me. I would love for it to be cheap or free in order to get started..